
Drill press manuals, like those for JET, Shopcraft, and Dayton models, are essential resources. They guide users through assembly, operation, maintenance, and troubleshooting procedures.
What is a Drill Press?
A drill press, as detailed in various manuals like those for JET (models J-A3816, J-A5816, J-A5818) and Dayton presses, is a stationary power tool primarily used for creating precisely drilled holes in a variety of materials. Unlike handheld drills, drill presses offer greater accuracy and control.
Manuals emphasize that these machines utilize a rotating cutting tool – the drill bit – held in a chuck, and are driven by an electric motor. They are invaluable for repetitive drilling tasks, offering consistent results. The provided documentation, including the 5 Speed Bench Drill Press W50005 owner’s manual, highlights the importance of understanding assembly before operation, ensuring safe and efficient use.
Types of Drill Presses
Drill press manuals categorize machines based on size, features, and application. Bench drill presses, like the 5 Speed Bench Drill Press W50005, are compact and suitable for smaller workspaces, often requiring assembly as outlined in their respective manuals.
Larger floor-standing models, such as the 15-inch Variable Speed Drill Press from JET, offer greater capacity and stability. Manuals also differentiate presses by speed control – some have fixed speeds, while others, like the JET models, feature variable speed options. Understanding these distinctions, as detailed in the operating instructions, is crucial for selecting the right tool for a specific task and ensuring optimal performance.
Safety Precautions
Drill press manuals consistently emphasize safety, covering general rules and required personal protective equipment (PPE) to prevent injuries during operation and maintenance.
General Safety Rules
Drill press manuals universally stress the importance of reading the entire manual before operation. Always disconnect power before making adjustments or changing bits. Secure workpieces firmly with clamps or a vise – never hold them by hand.
Maintain a clean work area, free from debris and obstructions. Wear appropriate PPE, including eye protection, and avoid loose clothing or jewelry. Be mindful of the drill bit’s path and ensure no one is in line with it.
Never force the drill press; let the bit do the work. Inspect the machine regularly for damage, and report any issues immediately. Understand emergency stop procedures and practice them. Proper training and adherence to these rules are crucial for safe operation.
Personal Protective Equipment (PPE)
Drill press manuals consistently emphasize the necessity of wearing appropriate personal protective equipment (PPE). Paramount is the use of safety glasses or a face shield to protect eyes from flying chips and debris. These manuals often highlight this as a non-negotiable safety measure.
Additionally, wearing close-fitting clothing and removing jewelry are recommended to prevent entanglement with moving parts. Ear protection may be advisable during prolonged use, given the drill press’s noise level.
Gloves are generally discouraged, as they can become caught in the machinery. Sturdy, closed-toe shoes are essential for foot protection. Prioritizing PPE significantly reduces the risk of injury during drill press operation.

Drill Press Components
Drill press manuals detail key parts: the base, column, table, spindle, and chuck. Understanding these components, as outlined in guides, is crucial for operation.
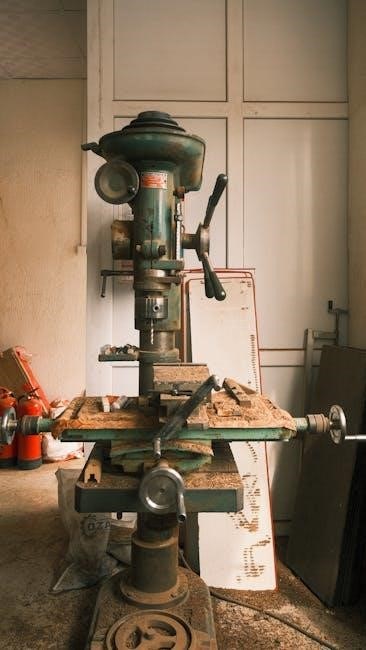
Base and Column
Drill press manuals consistently emphasize the base and column as foundational elements. The base provides stability, ensuring accurate drilling by minimizing vibration during operation. It’s typically cast iron for weight and rigidity.
The column, a vertical support, houses the spindle and allows for adjustable table height. Manuals illustrate how the column’s smooth surface guides the spindle’s movement. Proper alignment of the column is vital, and guides often detail inspection procedures.
These manuals frequently include parts diagrams identifying base and column components, aiding in maintenance and repair. Understanding their interplay is key to safe and precise drilling, as detailed within the provided documentation.
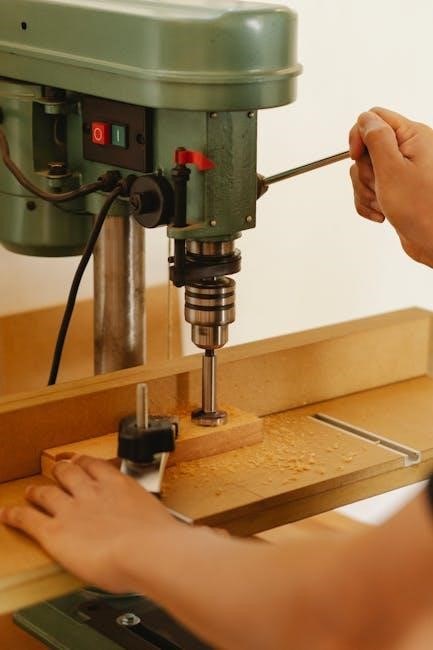
Table and Work Holding
Drill press manuals dedicate significant attention to the table and work-holding mechanisms. The table, often adjustable in height and angle, provides a secure surface for materials. Manuals detail how to lock and unlock the table for precise positioning.
Various work-holding devices, like vises and clamps, are covered extensively. Diagrams illustrate proper clamping techniques to prevent workpiece movement during drilling. Safety warnings emphasize securing the material to avoid hazards.
Manuals frequently include sections on table alignment and maintenance, ensuring accurate drilling results. Understanding these features, as outlined in the documentation, is crucial for safe and efficient operation.
Spindle and Chuck
Drill press manuals provide detailed instructions regarding the spindle and chuck assembly. They explain the spindle’s function in transmitting power from the motor to the chuck, which securely holds the drill bit. Manuals illustrate how to properly tighten and loosen the chuck using a chuck key.
Safety warnings prominently feature the importance of removing the chuck key immediately after use to prevent accidental activation. Diagrams showcase different chuck types and their compatibility with various drill bit shanks.
Maintenance sections cover spindle lubrication and chuck cleaning, ensuring smooth operation and prolonged lifespan. Proper understanding, guided by the manual, is vital for optimal performance.

Setting Up Your Drill Press
Drill press manuals detail assembly instructions, including attaching the base and column, and adjusting the table height and angle for precise work.
Assembly Instructions
Drill press manuals provide crucial step-by-step guidance for proper assembly. These instructions typically begin with securing the base to a stable surface, ensuring it’s level and firmly mounted. Next, the column is attached to the base, often requiring bolts and washers detailed in the parts list.
The table assembly follows, with clear diagrams illustrating how to connect it to the column and adjust its positioning. Manuals emphasize the importance of tightening all fasteners to the specified torque to prevent wobbling during operation. Finally, the head assembly, containing the spindle and motor, is mounted onto the column, completing the structural setup. Always refer to the specific manual for your model – J-A3816, J-A5816, or J-A5818 – as procedures may vary.
Adjusting Table Height and Angle
Drill press manuals detail how to adjust the table for optimal workpiece positioning. Typically, a rack and pinion system or a clamping mechanism allows for vertical height adjustments. Loosen the clamping lever, raise or lower the table to the desired height, and securely re-tighten the lever.
For angled drilling, manuals illustrate how to loosen the table locking screws and pivot the table to the required angle, often indicated by degree markings. Securely tighten the locking screws once the angle is set. Proper adjustment ensures accurate and safe drilling, preventing workpiece slippage or inaccurate hole placement. Refer to your specific model’s manual for detailed instructions.

Operating the Drill Press
Drill press manuals emphasize selecting the correct speed, using the chuck properly, and controlling feeding pressure for safe and accurate drilling operations.

Selecting the Correct Speed
Drill press manuals consistently highlight the importance of speed selection for optimal performance and material compatibility. Lower speeds are generally recommended for larger diameter bits and harder materials like metal, reducing heat buildup and ensuring a cleaner cut. Conversely, higher speeds are suitable for smaller bits and softer materials such as wood or plastic.
The manual for the 5 Speed Bench Drill Press (W50005) doesn’t explicitly detail speed charts, but stresses understanding the relationship between material, bit size, and rotational speed. Ignoring these guidelines can lead to bit breakage, workpiece damage, or even potential safety hazards. Always consult the manual for specific recommendations related to your drill press model and the material you are working with.
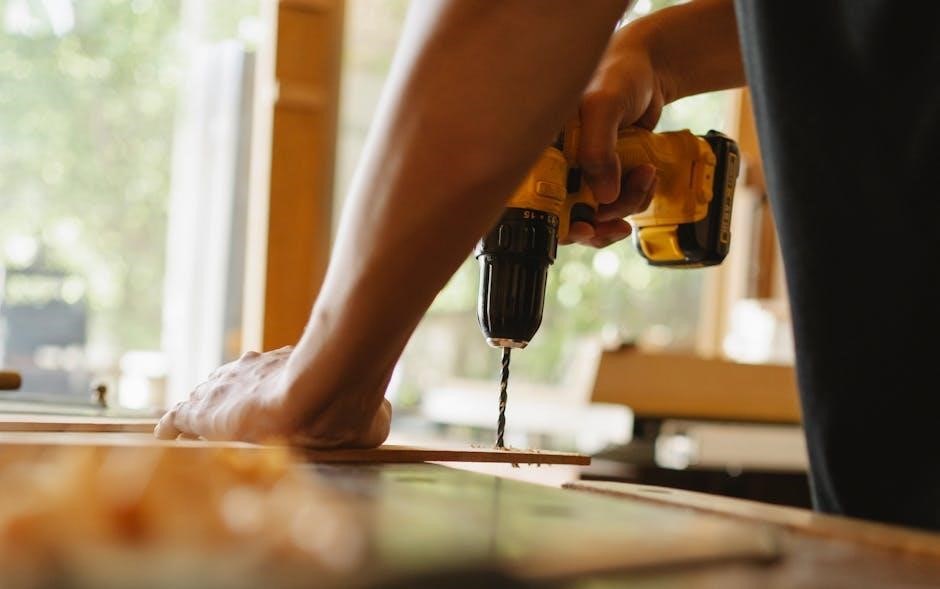
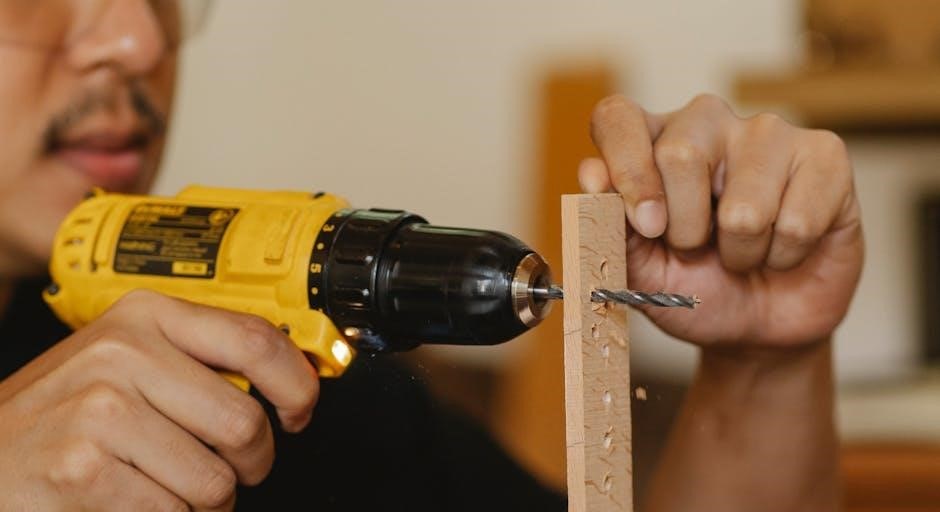
Using the Chuck and Drill Bits
Drill press manuals emphasize proper drill bit installation and tightening within the chuck. The chuck key should be fully inserted into each of the three keyholes, ensuring even pressure for a secure grip. Avoid over-tightening, which can damage the chuck or the bit itself. Always remove the chuck key immediately after tightening to prevent it from becoming a projectile during operation.
Manuals for models like the JET 15-inch Variable Speed Drill Press detail the importance of using the correct shank size drill bits compatible with the chuck. Regularly inspect drill bits for sharpness and damage, replacing dull or worn bits to maintain cutting efficiency and prevent strain on the drill press.
Feeding and Pressure Control
Drill press manuals consistently highlight the importance of controlled feeding. Begin with a slow, steady descent of the drill bit, increasing pressure gradually as the bit engages the material. Avoid forcing the bit, as this can lead to breakage, workpiece damage, or kickback. The manual for the 5 Speed Bench Drill Press stresses maintaining a consistent feed rate.
Proper pressure control is crucial for clean holes and extended tool life. Manuals often advise using a moderate, even pressure, allowing the drill bit to do the work. Excessive pressure generates heat and dulls the bit quickly. Observe the chip formation; long, continuous chips indicate a proper feed rate and pressure.
Maintenance and Troubleshooting
Drill press manuals detail lubrication, belt replacement, and solutions for common issues, ensuring optimal performance and longevity of your machine.
Lubrication
Regular lubrication, as outlined in your drill press manual, is crucial for smooth operation and extending the life of your machine. The manual will specify lubrication points, typically including the quill, spindle bearings, and motor bearings.
Use the recommended type of oil or grease – often a lithium-based grease for bearings and a light machine oil for the quill. Apply lubricant sparingly, avoiding over-greasing which can attract dust and debris.
Frequency depends on usage; heavier use requires more frequent lubrication. Consult the manual for specific intervals. Proper lubrication minimizes friction, reduces wear, and prevents overheating, ensuring consistent performance and preventing costly repairs. Ignoring lubrication can lead to premature failure of critical components.
Belt Replacement
Your drill press manual provides detailed instructions for belt replacement, a task essential for maintaining proper speed control. Begin by disconnecting power! Locate the motor cover and remove it to access the belt and pulleys. Note the belt routing before removal – a diagram in the manual is helpful.
Select the correct replacement belt, specified in the parts list. Carefully remove the old belt and install the new one, ensuring it’s seated correctly on all pulleys. Adjust belt tension as per the manual’s guidance; too loose causes slippage, too tight strains the motor.
Reinstall the motor cover and test the drill press through all speed settings.
Common Problems and Solutions
The drill press manual is your first resource for troubleshooting. A common issue is excessive vibration – check the base is secure and the workpiece is firmly clamped. If the drill bit wobbles, verify the chuck is tightened correctly and the spindle isn’t damaged.
For slow operation or belt slippage, inspect and potentially replace the drive belt, referencing the belt replacement section. If the drill press won’t start, check the power supply, switch, and motor overload protection. Always disconnect power before inspecting electrical components!
Consult the manual’s diagrams for component locations and proper procedures.
Drill Bit Selection
Drill press manuals detail various bit types – twist, spade, and Forstner – and guide users in choosing the optimal bit for specific materials and applications.
Types of Drill Bits (Twist, Spade, Forstner)
Drill press manuals comprehensively cover different drill bit types, each suited for specific tasks. Twist drill bits, the most common, excel at general-purpose drilling in wood, metal, and plastic. Spade bits create larger diameter holes quickly in wood, but can be less precise.
Forstner bits are ideal for creating flat-bottomed holes in wood, often used in furniture making and cabinetry. Manuals emphasize understanding each bit’s geometry and intended use. They also detail proper installation and speed recommendations for optimal performance and longevity. Choosing the correct bit prevents damage to both the workpiece and the drill press itself, ensuring safe and efficient operation.
Choosing the Right Bit for the Material
Drill press manuals stress the importance of material-specific bit selection. Drilling metal requires high-speed steel (HSS) or cobalt bits, while wood benefits from brad point or Forstner bits. Plastics demand specialized bits to prevent melting or cracking.
Manuals often include charts detailing recommended speeds and feeds for various materials and bit types. Using the wrong bit can lead to dulling, breakage, or poor-quality holes. Proper selection ensures clean cuts, extends bit life, and maintains safety. Always consult your manual for guidance, prioritizing the correct tool for the job at hand for optimal results.

Advanced Techniques
Drill press manuals detail techniques like mortising and compound angle drilling, expanding capabilities beyond basic hole creation for skilled woodworkers and metalworkers.
Using a Mortising Attachment
Drill press manuals often include sections on utilizing a mortising attachment, transforming the drill press into a dedicated mortising machine. These attachments typically consist of a robust frame and specialized bits designed to hollow out rectangular recesses – mortises – in wood.
The manual will guide you through proper attachment installation, bit selection based on mortise dimensions, and crucial speed adjustments. Precise table positioning and controlled feed rates are emphasized to achieve clean, accurate mortises. Safety precautions are paramount, as mortising generates significant force and vibration.
Understanding the attachment’s limitations and recommended wood types is also covered, ensuring optimal performance and preventing damage to both the workpiece and the drill press itself. Proper maintenance of the mortising attachment, as outlined in the manual, extends its lifespan and maintains accuracy.
Drilling Compound Angles
Drill press manuals detail techniques for drilling at compound angles – when the workpiece is tilted both towards and away from the drill bit. This is achieved by swiveling the drill press table on both its horizontal and vertical axes. The manual stresses the importance of securely locking both angles before initiating drilling.
It explains how to calculate the correct angles needed to achieve the desired result, often referencing trigonometric functions or providing angle charts. Safe clamping of the workpiece is crucial, preventing movement during the angled cut.
Manuals also caution against excessive feed pressure, which can cause bit wandering or damage. Regularly checking the angle settings during longer operations ensures accuracy. Understanding the limitations of the drill press table’s swivel range is also highlighted.